427 SBF

Someone I respect told me to do it this way as a quick and dirty little test. This is likely the advice I will follow.

Guess close at pushrod length. it won't matter if it's not centered on valve tip for this process.

Clay the piston top, set up intake and exhaust valves with checking springs, set head on with no bolts or head gasket, roll the engine over in reverse rotation.
This way the exhaust valve will chase the piston down and if you truly have a collision the valve will simply lift the head, nothing bent or broke this way.
If you roll engine forward then piston chases ex valve closing and it is a harder crash.

Then just add gasket thickness.
 
Someone I respect told me to do it this way as a quick and dirty little test. This is likely the advice I will follow.

Guess close at pushrod length. it won't matter if it's not centered on valve tip for this process.

Clay the piston top, set up intake and exhaust valves with checking springs, set head on with no bolts or head gasket, roll the engine over in reverse rotation.
This way the exhaust valve will chase the piston down and if you truly have a collision the valve will simply lift the head, nothing bent or broke this way.
If you roll engine forward then piston chases ex valve closing and it is a harder crash.

Then just add gasket thickness.
If you were to use the regular spring with a pushrod checking tool, you will not have a pushrod checking tool anymore.
 
Someone I respect told me to do it this way as a quick and dirty little test. This is likely the advice I will follow.

Guess close at pushrod length. it won't matter if it's not centered on valve tip for this process.

Clay the piston top, set up intake and exhaust valves with checking springs, set head on with no bolts or head gasket, roll the engine over in reverse rotation.
This way the exhaust valve will chase the piston down and if you truly have a collision the valve will simply lift the head, nothing bent or broke this way.
If you roll engine forward then piston chases ex valve closing and it is a harder crash.

Then just add gasket thickness.
And then after you do this quick dirty test if anything is close I'd be checking it with real life parts.
Surely you won't bend anything while turning it by hand, you should feel the dead stop.
I ran 27 thou piston to head.
60 thou piston to valve.
Checked with real springs, head gaskets, torqued and clay.
Be careful not to get clay down into the ring land, more of an issue on canted valves
 
Many years ago, during cancer, I was building an engine for the wifey. I had put a new higher compression rotating assembly in it. Set the head on, no gasket, no bolts, two checker springs with two adjustable pushrods, started to turn the engine over, and the head is rocking!

While my clay (playdoh) on top of the piston was good, the crown of the piston was hitting the head! I never knew that you couldn't just get a pair of 23* pistons (stock GM SBC stuff) and a normal set of AFR heads, and put it together.........

So now I had to work on the piston to head issue. Talked to an engine builder, he agreed with my brilliant idea. I used dye chem on the head, put it back on with no gasket, and saw where the pistons were making contact. Covered the entire engine with newspaper and tape, a LOT of tape, and used my Dremel tool with a small sanding roll and slowly removed material from the dome. Once I had that solved when I put a gasket on there it gave me .040 more. Was that correct? Hell no! With the minimal amount of material removed I was not worried about changing the balance. That engine made 1000-some passes before it split the block. I knew it would happen, it was out of an 89 Vette, those blocks are thin and weak. But we had fun with it for a long time! I sold it to a friend that got a new crank for a 2-piece rear main seal block and built another engine out of all of it. He went 10.60 with it, the same as we did. His older block should last forever.

Oh, I was fighting cancer and doing chemo and radiation at the time so I wasn't really worried about how long that engine would last. But we are both still here!

That is also the same engine I fought with to degree the cam.
 
And then after you do this quick dirty test if anything is close I'd be checking it with real life parts.
Surely you won't bend anything while turning it by hand, you should feel the dead stop.
I ran 27 thou piston to head.
60 thou piston to valve.
Checked with real springs, head gaskets, torqued and clay.
Be careful not to get clay down into the ring land, more of an issue on canted valves

If he's good with checking springs he'll be good with the real springs.
 
If he's good with checking springs he'll be good with the real springs.
Yeah.
The whole thing adds to many variables for me, as far as a final set up. No gaskets, no bolts/torque etc but I run tight clearances also.
More than one way to skin a cat. 👍
This method has worked for me with very tight clearances in a manual shift street car and it's how my engine builder friend does it so I stick with it.
 
So you guys don't see any issues with checking piston to head using clay with no bolts holding the head down and not checking actual head gasket thickness?
 
So you guys don't see any issues with checking piston to head using clay with no bolts holding the head down and not checking actual head gasket thickness?
I have done it with studs/nuts in place just hand tight. Flat top pistons, soft checking springs, solid lifters and Play-Doh. Run it through, pull head off and pie cut the Play-Doh. Measure, then add compressed gasket thickness. Never had an issue. Maybe if it was super tight, I could see wanting to make sure, but I've always had a good amount of clearance IIRC.

P.S. When I was using Ford Racing Hydraulic Lifters, I modified 2 spares to convert them to solids for checking ptv clearance, and pushrod length.
 
I have done it with studs/nuts in place just hand tight. Flat top pistons, soft checking springs, solid lifters and Play-Doh. Run it through, pull head off and pie cut the Play-Doh. Measure, then add compressed gasket thickness. Never had an issue. Maybe if it was super tight, I could see wanting to make sure, but I've always had a good amount of clearance IIRC.

P.S. When I was using Ford Racing Hydraulic Lifters, I modified 2 spares to convert them to solids for checking ptv clearance, and pushrod length.
Yes, but you are hand tight at least. Lots of things I don't know also, flat tops or dish (i assume no dome) piston in bore or up. And like you said, you run lots of clearance. My last one was 12.8:1 on pump 93 so extra clearance could cause issues with end gases. That one had the 27 thou piston to head and 60 thou valve clearance. My xe will be on racing fuel and will have more clearance. However I still like doing my checks with actual parts. I want to know my real lift numbers and coil bind numbers etc. And I hate the idea of recompressing air, lol. I have a set of c302b heads from luna racing iirc where you can see the contact from the pistons, that's perfect 👌😆
 
The first test is to verify its not a cluster fuck. Once it passes the dirty test I'll clay it for real
The dirty test, lol.
Is the piston at zero deck ?
What fuel do you plan on running on the street?

When built wrong a 9.5:1 engine can run on when shut off, when built right a 12:1+ engine will shut off and start instantly with pump 93 🙂😉
 
@89Fox427, call @Mitch and @Banger and get this muther fucker together already

allstate-MITCHNMARK.jpg
 
The dirty test, lol.
Is the piston at zero deck ?
What fuel do you plan on running on the street?

When built wrong a 9.5:1 engine can run on when shut off, when built right a 12:1+ engine will shut off and start instantly with pump 93 🙂😉
93 octane
.01 in the hole
 
Does it spin freely? If it’s truly zero you might need a different thrust plate.

How are you measuring it?

Edit: Or shave .004” off the sprocket. Or buy a new timing chain set, or thrust plate with Torrington bearing.
 
Last edited:
Does it spin freely? If it’s truly zero you might need a different thrust plate.

How are you measuring it?
A dial indicator on the sprocket. I degreed it so what do you mean by spins freely
 
Oops, should have checked that before loc-tight.

Luckily I did not lock tite!

@Steve439 yes of course, however this cam has enough room to damn near be pushed out of the journals if you keep pushing rearward.

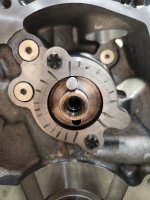
I've discovered the cam gear is rubbing the retainer plate ever so slightly. Made some marks on the retainer, torqued the sprocket, spun it by hand, and there's about 90 degrees where it feels much tighter. Found this


20250611_122656.jpg
 
Back
Top